zfn9
zfn9
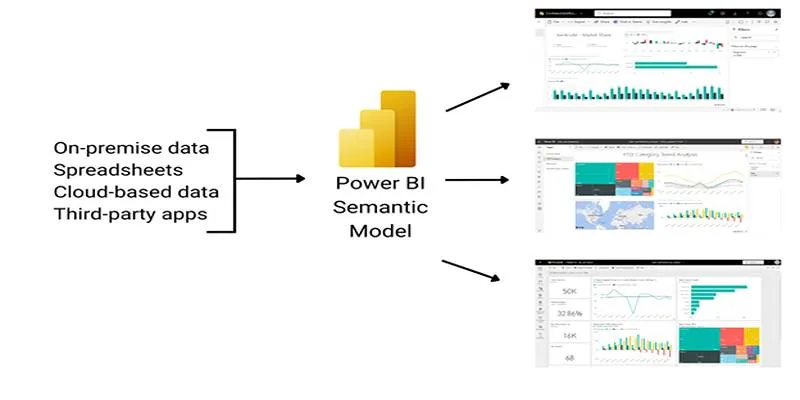
Installing software might feel daunting, especially when it involves tools like Power BI Desktop. However, setting up this powerful, free application from Microsoft is more straightforward than you might think. Power BI Desktop allows users to import data, clean it, and create stunning visual reports seamlessly. If you’ve installed apps on Windows before, you’re all set for this.
This guide will walk you through the complete installation process, detail the system requirements, and provide tips to avoid common pitfalls. It’s a quick setup that offers substantial benefits once completed.
Understanding Power BI Desktop Installation Requirements
Before downloading, ensure your system meets the necessary requirements for a smooth installation. Power BI Desktop doesn’t require high-end hardware but does need some basic specifications. Your machine should run Windows 10 or Windows 11 with the .NET Framework 4.7.2 or later installed. This is crucial; without it, Power BI Desktop won’t function.
Regarding memory, Microsoft suggests a minimum of 4 GB RAM, but for handling larger datasets or extensive data modeling, 8 GB or more is recommended. While the setup file is lightweight—under 1 GB—ensure you have sufficient free disk space, especially if you plan on installing additional Microsoft tools.
Note: Power BI Desktop isn’t available for macOS. Mac users need a Windows virtual machine or can use the Power BI service through a web browser, though it offers fewer modeling features.
You can install Power BI Desktop via the Microsoft Store or the .msi installer from Microsoft’s website. The Store version updates automatically, providing ease of use. The .msi installer offers more control over updates and installation locations, ideal for advanced users or enterprise settings avoiding Store-based apps.
Step-by-Step: How to Install Power BI Desktop
We’ll explore both installation methods so you can choose the best fit for your needs.
Option 1: Installing via Microsoft Store
If your PC is linked to a Microsoft account and the Store app functions well, this is the simplest method. Open the Microsoft Store from your Start menu, search for “Power BI Desktop,” and select the result from Microsoft Corporation. Click “Get” or “Install,” and let Windows manage the rest. This method is convenient—updates occur automatically in the background like other Store apps.

However, if you’re in a corporate environment, IT restrictions might prevent Store access. If so, you’ll need to use another installation method. Also, this version installs in the user folder, not under Program Files, which might complicate management in professional settings with strict permission controls.
Option 2: Installing via .msi Installer (Direct Download)
For manual installation, visit the official Power BI download page and click “Advanced Download Options.” Choose between 32-bit and 64-bit versions—most modern systems should select 64-bit.
Download the installer, run the .msi file, and follow the setup wizard: accept the license agreement, choose your install location, and click “Install.” The process usually completes in under two minutes.
This version provides flexibility for multiple installations or tighter integration with enterprise tools. It’s also ideal if you prefer manual updates over automatic ones.
After installation, launch Power BI Desktop from the Start menu. You might be prompted to sign in with a Microsoft or organizational account. While optional for offline use, signing in enables cloud-based features like Power BI Service, report sharing, and collaborative workspaces.
Post-Installation Setup and First-Time Use
After installing Power BI Desktop, you’re almost ready to start creating visual reports. However, a few initial setup steps can enhance your workflow and prevent future issues.
First, update your data connectors. Power BI Desktop comes with built-in connectors for data from Excel, SQL databases, websites, and various APIs. Microsoft frequently updates these connectors for optimal compatibility. Keeping them current ensures fewer bugs and smoother connections.
Next, verify your regional settings. Power BI uses Windows settings for date formats, currencies, and number delimiters. If dealing with international datasets, mismatched formats can cause errors. Adjust these settings in the options menu to match your data’s format.
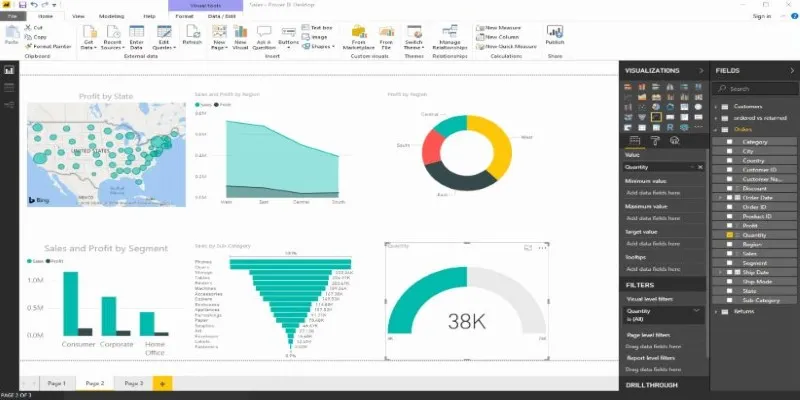
Familiarize yourself with the interface. Power BI Desktop includes three main views—Report, Data, and Model—accessible via icons on the left pane. Report view is for dashboards, Data view displays raw datasets, and Model view defines table relationships. Understanding these sections will streamline your process.
The ribbon menu, similar to Microsoft Excel, houses tools for importing, cleaning, and visualizing data. Explore it to discover available features.
Lastly, although Power BI Desktop can operate offline, logging in with a Microsoft 365 account allows you to publish and collaborate using Power BI Service—an invaluable option for team projects.
Conclusion
Installing Power BI Desktop is a straightforward process that unlocks powerful data analysis and visualization capabilities. Whether you opt for the Microsoft Store or a manual installer, setup takes just a few minutes. Post- installation, updating connectors, adjusting settings, and exploring the interface ensures a seamless experience. From individual data exploration to collaborative dashboard sharing, Power BI Desktop equips you with the tools needed to transform raw data into insightful visualizations, all from your desktop.