zfn9
zfn9
Imagine describing something in words—like “a purple elephant riding a skateboard”—and seeing it instantly transform into a picture. That’s the magic of DALL·E 3. It’s an advanced AI that takes your text input and creates images from it. But what if you want to make small changes to that image or create a new version with slight variations? That’s where Copilot Image Creator shines. It provides you with the tools to generate and easily edit your AI-generated pictures—all in one place, even if you’re not a designer or an artist.
What is DALL·E 3 and Where Does Copilot Fit In?
DALL·E 3 is an image-generation AI developed by OpenAI. It’s trained to understand descriptions in plain language and turn them into detailed pictures. For example, if you type “a cottage in a snowy forest at sunset,” DALL·E 3 comprehends those words and creates an image to match them.
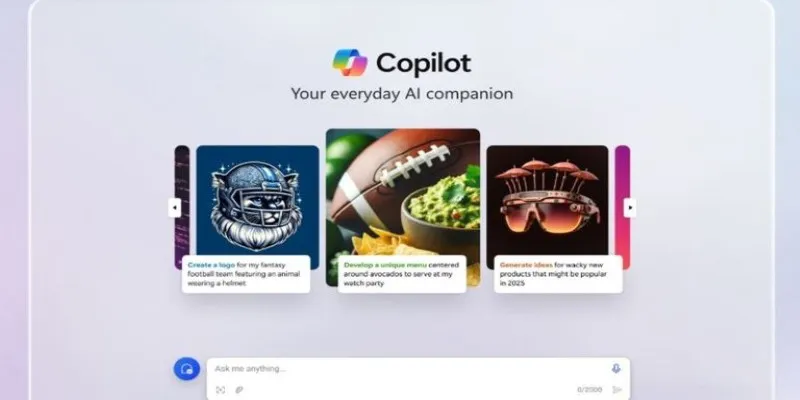
Copilot Image Creator is a tool that leverages DALL·E 3, making it easier for everyday users to interact with. You don’t need to install anything—it usually operates through web browsers, sometimes integrated into platforms like Microsoft Edge or Bing. Think of Copilot as your digital assistant—it listens to your prompt, communicates it to DALL·E 3, and then shows you the result.
What makes Copilot special is that it doesn’t stop at creating images. It also allows you to tweak them. If you like the picture but want the cat in the background to be a dog, you can ask Copilot to make that change. No photo- editing skills are required.
The tool is user-friendly and often integrated into websites. You don’t need an account in some cases, although signing in might unlock more features. It’s made for anyone who wants to visualize their ideas—students, teachers, content creators, or just curious minds.
Creating Your First AI Image Using Copilot and DALL·E 3
To create your first image with Copilot and DALL·E 3, start by opening your browser and visiting the Copilot Image Creator page. If you’re using Microsoft Edge, you might notice a small sparkle or paintbrush icon that opens the tool directly. Once you’re on the page, you’ll see a text box—this is where the fun begins.
In that box, type out a short description of the image you want. For example, you could write “a golden retriever wearing sunglasses at the beach” or “a futuristic city floating in the sky.” Try to include a few specific details like colors, the setting, or what’s happening in the scene. The clearer your idea, the better the results.
Once your prompt is ready, click the button that says “Create” or “Generate.” In just a few seconds, the AI will present several versions of your image based on your description. These results typically appear in a grid, showcasing different takes on your idea. You can click on any of them to view them in more detail. If you find one you love, it’s easy to download or share. If the results don’t feel quite right, you can update your prompt or add new details to help the AI better understand your vision.
There’s also an option to “refresh” or “re-imagine” the prompt, which tells the AI to take the same idea and try again with a fresh perspective. This can be helpful when you’re not sure what you’re looking for but want to explore different styles or moods.
Another helpful feature is prompt history. It lets you revisit your previous ideas and adjust them without starting from scratch. This makes experimenting easy, allowing you to build on what you’ve done and gradually refine your image until it looks just right.
Editing and Customizing Images: Making Changes Without Starting Over
Once you’ve generated an image, you might notice things you’d like to adjust. Maybe the lighting is too dark, or the cat looks more like a lion. This is where Copilot’s editing features shine.

First, look for the “Edit” or “Modify” button under your image. Some versions of the Copilot Image Creator will let you erase part of the image and type what should go there instead. This is called inpainting. For example, if there’s a red balloon in the sky and you want it to be blue, you can select that area and type “blue balloon,” and the AI will redraw that part.
Another way to make changes is to update your prompt. For example, if your first request was “a boy reading under a tree,” and the image came out with too many shadows, just change your prompt to “a boy reading under a tree in bright sunlight” and generate again. The AI will keep your original idea but improve it based on your update.
If you want a different angle or mood, try changing the point of view. Say “from above,” “in winter,” or “in a cartoon style.” Copilot is adept at understanding those shifts.
There’s even a remix feature in some versions, which lets you start from an existing image and explore variations of it—like changing the background or turning a daytime scene into night.
Copilot also helps if you want to create a series of consistent images. For example, for a school project or a digital storybook, you can keep reusing the same character and just update their setting or activity. Typing things like “the same girl now riding a bike” helps the AI know what you mean.
Conclusion
Using DALL·E 3 with Copilot Image Creator is like having a magic paintbrush that listens to your thoughts. You type what you imagine, and the tool turns it into a picture—and then lets you change anything you want. Whether you’re making art for fun, designing something for school, or testing out a creative project, it’s a simple way to bring your ideas to life. With a little practice in writing prompts and using the edit tools, anyone can become a visual storyteller—even without knowing how to draw. The more you experiment, the more confident and creative you’ll get with each new image you create.